Image Sensing with openCV
ㅡ Image Sensing with openCV
Table of Contents
- Introduction
- Drawing figures using openCV
- Image_processing_using_openCV
- Image processing using openCV
- License
- About
Introduction
Use face-recognition 1.3.0. Use the colaboratory. Use openCV. 세 가지를 이용해서 이미지 처리하는 방법에 대해 학습
tutorial 을 참고 하자!
Drawing_figures_using_openCV
import cv2 as cv
import numpy as np
from matplotlib import pyplot as plt

# 이미지 버퍼 생성
# buffer = np.full((256,256,3), 255, np.uint8)

# 이미지 버퍼 가공
buffer = np.full((512,512,3), 255, np.uint8)
# cv.line(buffer,(0,0),(511,511),(255,0,0),5)

#rectangle
cv.rectangle(buffer,(384,100),(510,328),(0,255,0),3)
#circle
cv.circle(buffer,(447,63), 63, (0,255,0), -1)
#ecllipse
cv.ellipse(buffer,(256,256),(100,50),0,0,180,255,-1)

#poly
pts = np.array([[10,5],[20,30],[70,20],[50,10]], np.int32)
pts = pts.reshape((-1,1,2))
cv.polylines(buffer,[pts],True,(0,255,0))
# line
cv.line(buffer,(0,0),(511,511),(0,255,0),5)

# 이미지 버퍼 출력
plt.imshow(buffer)
plt.show()
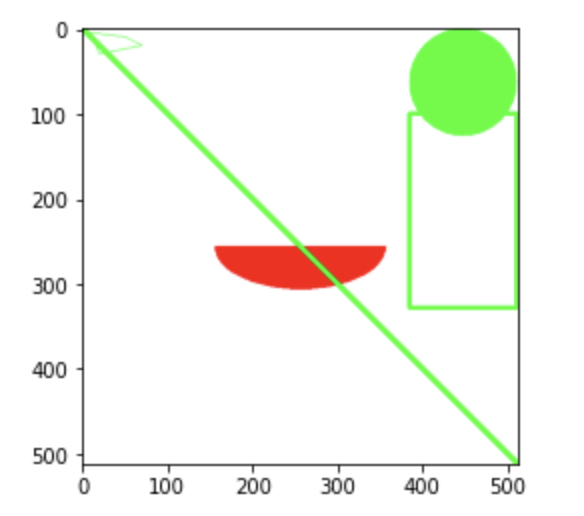
openCV 를 이용해 기본 도형을 그릴 수 있다.
openCV 확인해보면 더 많은 정보가 있다.
Image_processing_using_openCV
from google.colab import drive
drive.mount('/gdrive')
주어진 구글 드라이브 접근을 허용한다.
이때, face_recognition 패키지를 사용한다.
!pip install face_recognition
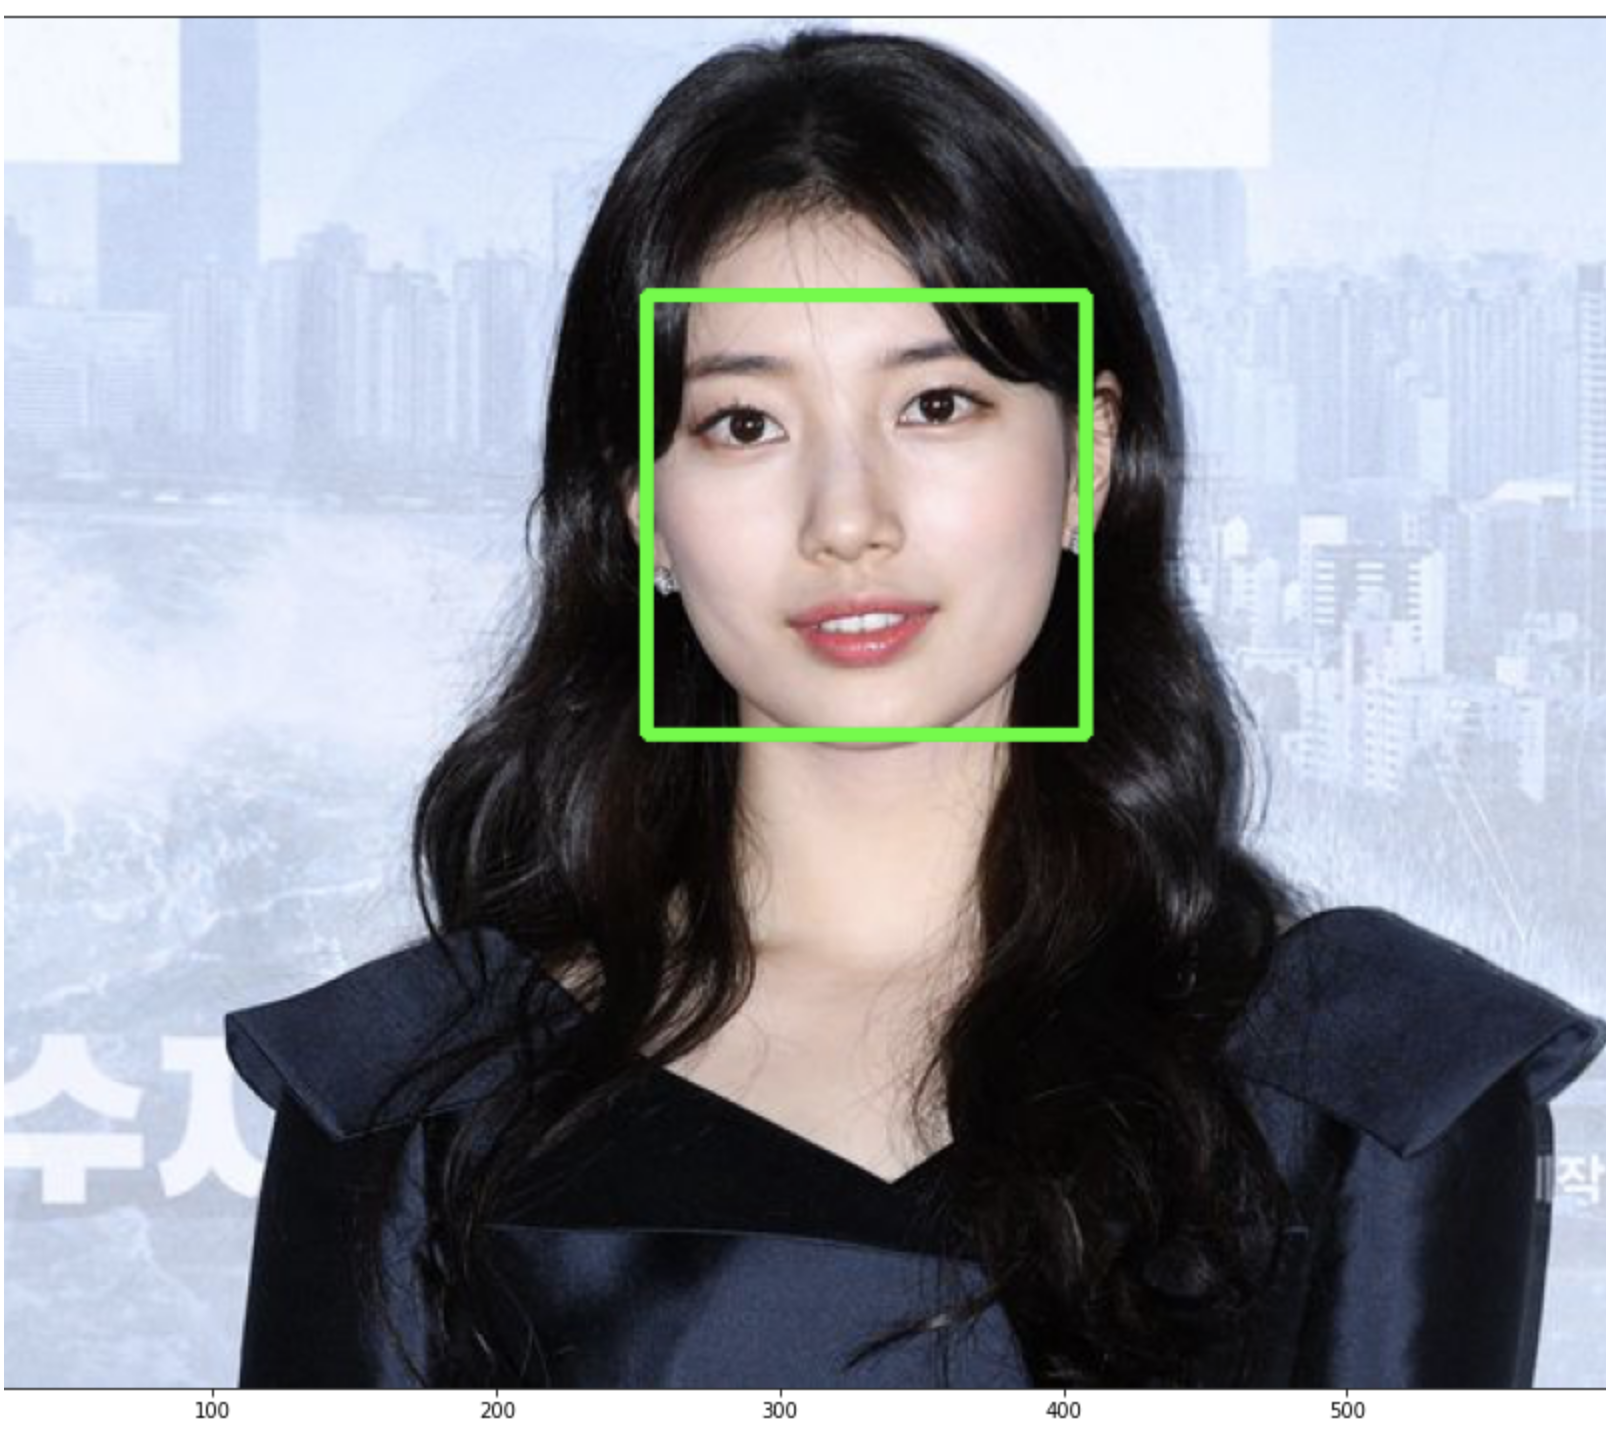
face_recognition package 를 사용하여 openCV로 인물의 얼굴을 찾을 수 있다.
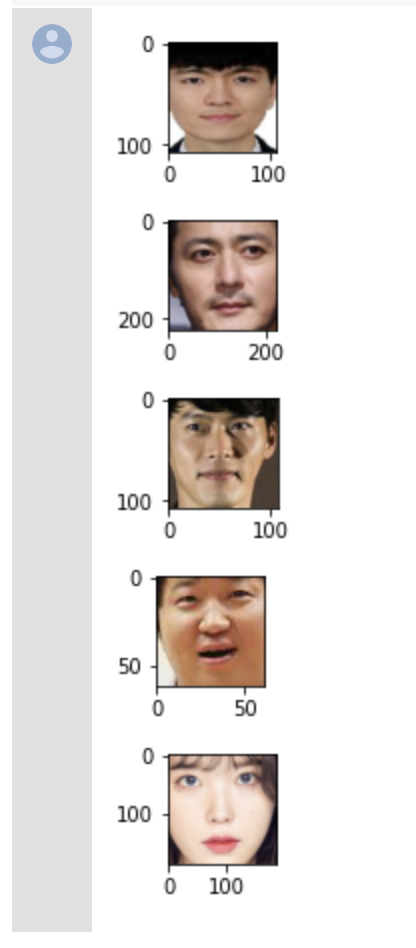
이와 유사하게,여러 인물의 사진에서 얼굴을 좌표를 알아내서 자를 수 있다.
이미지 파일을 로드하여 person_list 생성 얼굴 좌표를 알아내서 자른다. 이후, person_list에서 잘라낸 face_image 를 저장한다. face_list에 저장된 얼굴들을 출력한다.
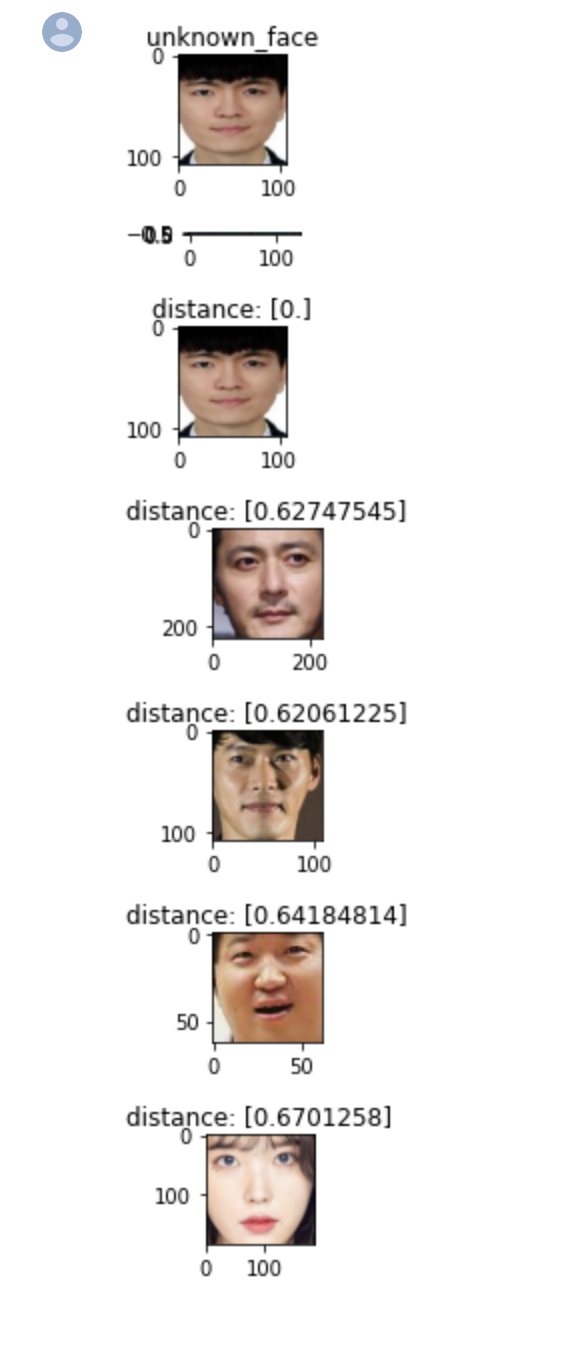
이제 인물 유사로들 살펴보면,
기존에 없는 새로운 파일을 열고 얼굴좌표를 알아와서 자른다. unknown_face 라는 타이틀을 생성하고 인코딩하여 기존에 face_list와의 인코딩 값을 비교하여 distance 를 비교한다. 0.5에 가까우면 비슷한 사람 그 이상이면 아주 다른사람으로 살펴볼 수 있었다.
license
MIT License
About
Authored and maintained by ingyu